Process View
The Process view is the default view in Notification Manager. Before notification processing can be used, the events and criteria that are available when creating notification rules must first be defined here. Follow the steps below to configure events and criteria.
- Go to Maintenance > new world ERP Suite > Notification Manager, the Notification Manager page opens with the Process page. The Process view displays by default. A list of processes that utilize the Notification Manager are listed.
- Click on the link for the process you want to define and a Notification Manager Process Maintenance pop-up window opens with the name of the process displayed in the title bar.
- Select the Priority for the process. The available options are defined in Validation Set 307, Notification Priority. This value is required.
- On the Events tab, in the Available Event(s) list select the event(s) that should be included in the process and click
 to move it to the Selected Event(s) list. At least one event is required.
 - Select the Criteria tab. In the Available Criteria list select the criteria that should be included in the process and click to move it to the Selected Criteria list.
- Click Save to retain the settings. Click Close to close the window.
- Repeat Steps 1-4 for other processes, if desired. Click Save to retain the settings.
Add Rule
After the events and criteria are set up, rules for notifications need to be defined.
- On the Notification Manager-Process home page, select a process to highlight the row.
- Click Add Rule. The Notification Manager Rule Entry pop-up window displays.
- Enter the Rule Name. This value is required; it will display on the Notification Manager home page. The name may contain up to 32 characters.
- Enter a Description of the rule. This value is optional and provides more details about the rule. The description may contain up to 64 characters; if a value is provided, it will also appear with the Rule Name on the home page.
- TheActivecheck box is selected by default. Clear it if you do not want the rule you are adding to be active at this time, or clear it at a later date if you need to suspend use of the rule.
- On the Events tab, select the events in the Available Event(s) list to which this rule should apply and click to move it to the Selected Event(s) list. At least one event must be selected. The events options are defined by New World ERP.
- Click the Users tab.
- Select at least one Available User to which this rule should apply and click to move the user name in the Selected User(s) list.
Users are notified via the myNotifications panel on the New World ERP home page. For users to receive notifications via email, it is suggested that they go to the Email Notification link on the New World ERP home page and select the appropriate Notifications option. See Email Notification for more information.
- To select multiple items randomly throughout the list, press and hold CTRL while clicking each item.
- To select multiple consecutive items, press and hold SHIFT, and click the first item then the last item.
 to move all items, selected or not, to the Selected box.
 returns the selected items to the Available box.
 returns all items to the Available box.
- Click the Employees tab. If your organization does not have a license to the Human Resources module, this tab is not available and you can skip to step 10.
- Select at least one Available Employee to which this rule should apply and click to move the employee name to the Selected Employee(s) list.
Employees are notified via the email address defined in their employee record in Employee Maintenance.
- To select multiple items randomly throughout the list, press and hold CTRL while clicking each item.
- To select multiple consecutive items, press and hold SHIFT, and click the first item then the last item.
to move all items, selected or not, to the Selected box.
returns the selected items to the Available box.
returns all items to the Available box.
- If you want the event to send a notification to a specific email address (other than New World ERP users or employees), click the Email Addresses tab.
Note: The Email Addresses tab is normally used for notifying non-New World ERP users.
- In Email Address, type an email address and click Add. Add more email addresses as needed. The email the user gets will include a link to the transaction in New World ERP, based upon their security. To use a Work Order Request for Action as an example,
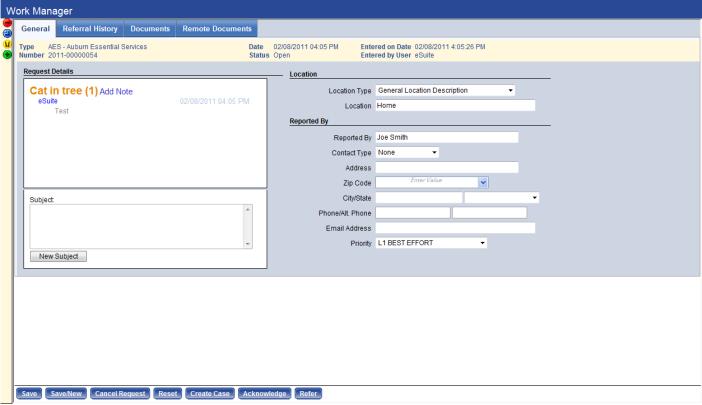
- Users with add and change permissions will go to the Work Manager edit screen, with the request for action loaded.
Show me
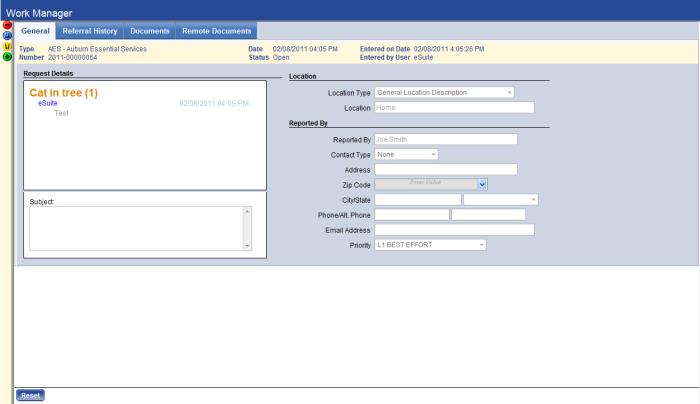
- Users with full permissions to the RFA type but only view permissions to RFA Entry will go to the Work Manager page in inquiry mode.
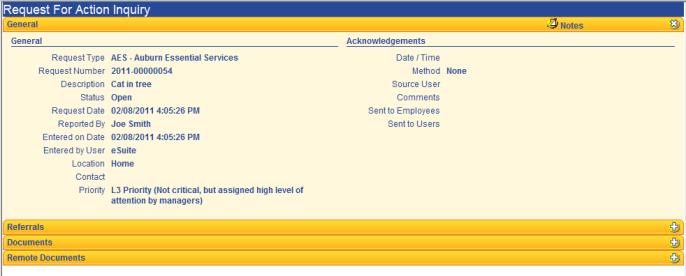
- Users with full permissions to the RFA type and RFA Inquiry but no permissions to RFA Entry will go to the Request for Action Inquiry pop-up.
- Users with full permissions to the RFA type but no permissions to RFA Inquiry or RFA Entry will go to the Request for Action Inquiry pop-up, where a "not authorized" message displays.
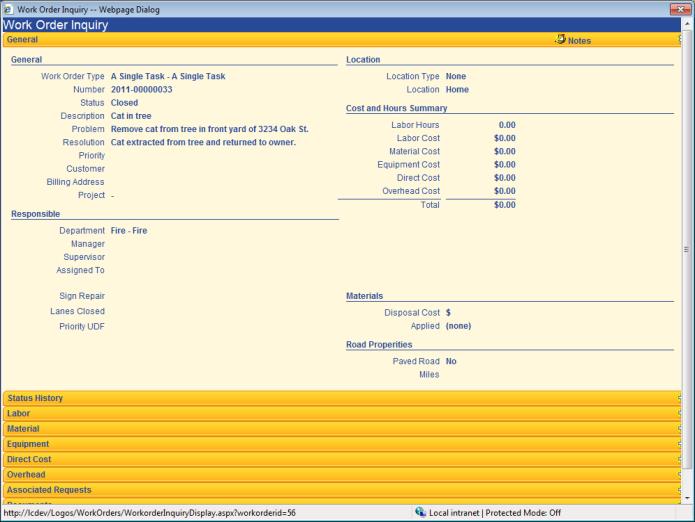
- If the request for action is closed, users with permissions to the RFA type and RFA Inquiry will go to the Request for Action Inquiry page, which will display the work order number as a link to the Work Order inquiry pop-up.

- Click Save to retain the settings.
- Saving the record enables the Criteria tab. Select this tab to define criteria.
- Select the Criteria Type (e.g., Department), for which you want to specify criteria. The Available Criteria list displays and populates based on the selection.
- Select the Available Criteria to which this rule should apply and click to move it to the Selected Criteria list.
- To select multiple items randomly throughout the list, press and hold CTRL while clicking each item.
- To select multiple consecutive items, press and hold SHIFT, and click the first item then the last item.
to move all items, selected or not, to the Selected box.
returns the selected items to the Available box.
returns all items to the Available box.
- Click Save to retain the settings. Repeat the above steps to add any other rules that are needed. Click Close to close the window.
See Also